How to Turn Blueprints Into 3D With Real-World Accuracy
This article introduces four steps to transform floor plans into accurate 3D models with Archisketch.


If you work in architecture, remodeling, or construction, you’ve probably experienced this at least once.
- You spread out a 2D floor plan during a client meeting and carefully explain every detail—only to see their eyes glaze over.
- No matter how thoroughly you explain, they just can’t picture what the space will actually feel like.
The reason is simple. A 2D floor plan only provides a top-down view. You can confirm the location of walls, room dimensions, and the placement of doors and windows. But what your client truly wants to know is something entirely different.
"How big is this space really going to feel?"
"How will natural light come through the windows?"
"If we place furniture in this hallway, will it feel cramped?"
- Details like ceiling height, the real sense of window scale, the thickness of walls, and level differences between spaces—none of this can ever be fully communicated through 2D drawings alone.
- When this gap in communication isn’t resolved, it can eventually lead to complaints after construction is complete. And that’s a headache no one wants.
In the end, the tool that truly persuades clients isn’t 2D—it’s 3D.
But then comes the issue of time. Learning professional 3D software like SketchUp or Autodesk 3ds Max can take months.
Those of you reading this are already busy—working on-site, meeting clients, preparing estimates, and managing projects. There’s simply no room in your schedule to enroll in a full course just to learn complex 3D software.
But what if there were a tool that is both professional and easy to learn? That tool is Archisketch.
How To Turn Blueprints Into 3D with Archisketch
Let’s walk through how to convert a 2D floor plan into 3D using Archisketch. Even if it’s your first time, we’ll guide you step by step so you can easily follow along.
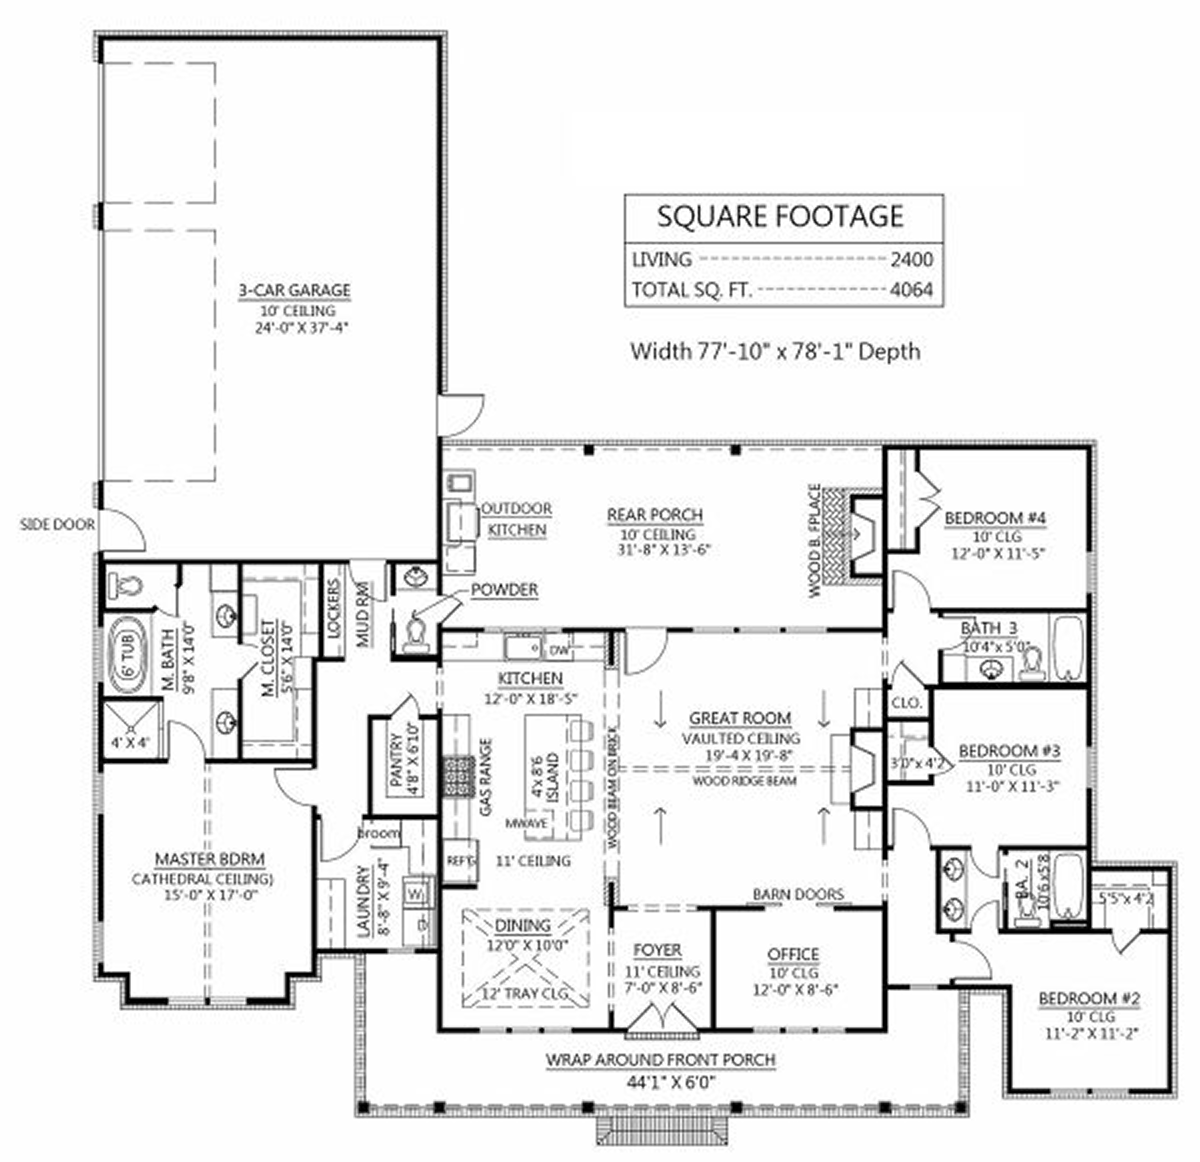
1) Upload Your 2D Floor Plan
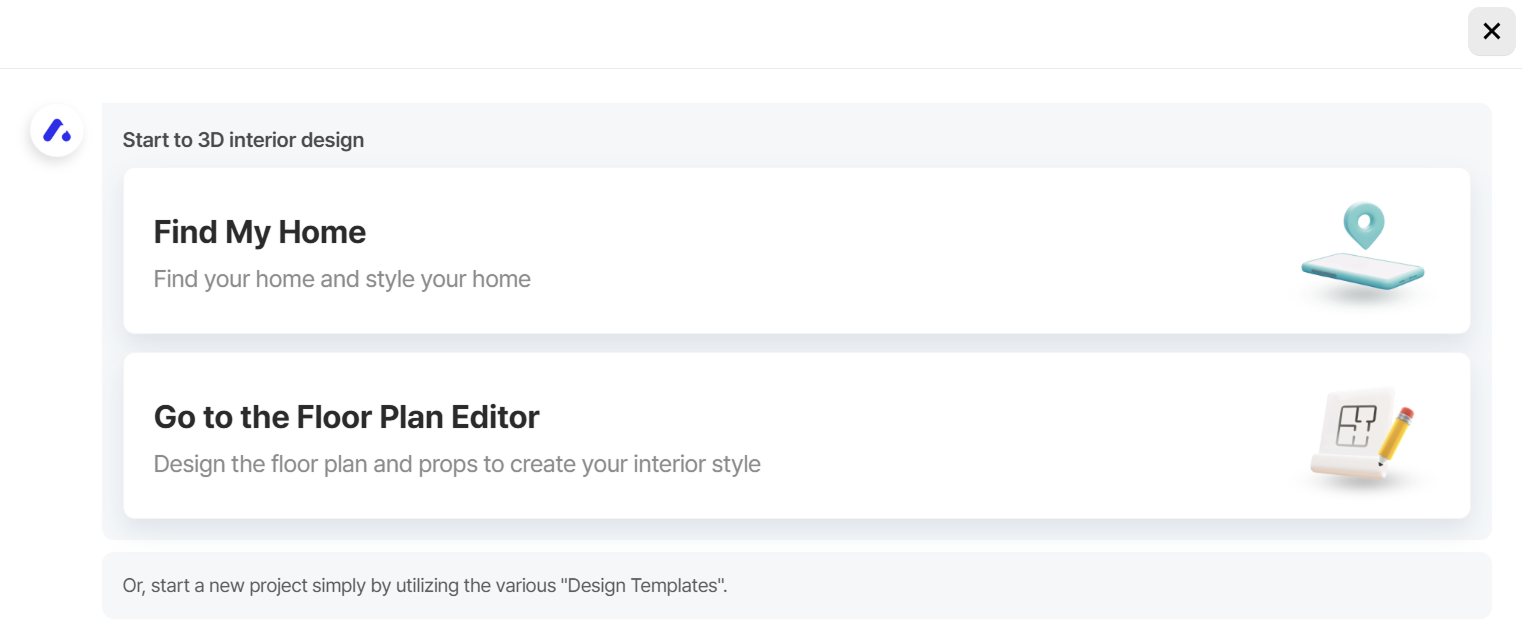
After logging into Archisketch, click Create a New Project. You’ll see two buttons—select Go to the Floor Plan Editor.
Next, click Upload floor plan image.

Now upload your 2D floor plan to Archisketch. You can upload JPG, JPEG, PNG, or GIF files. The maximum file size is 10MB.
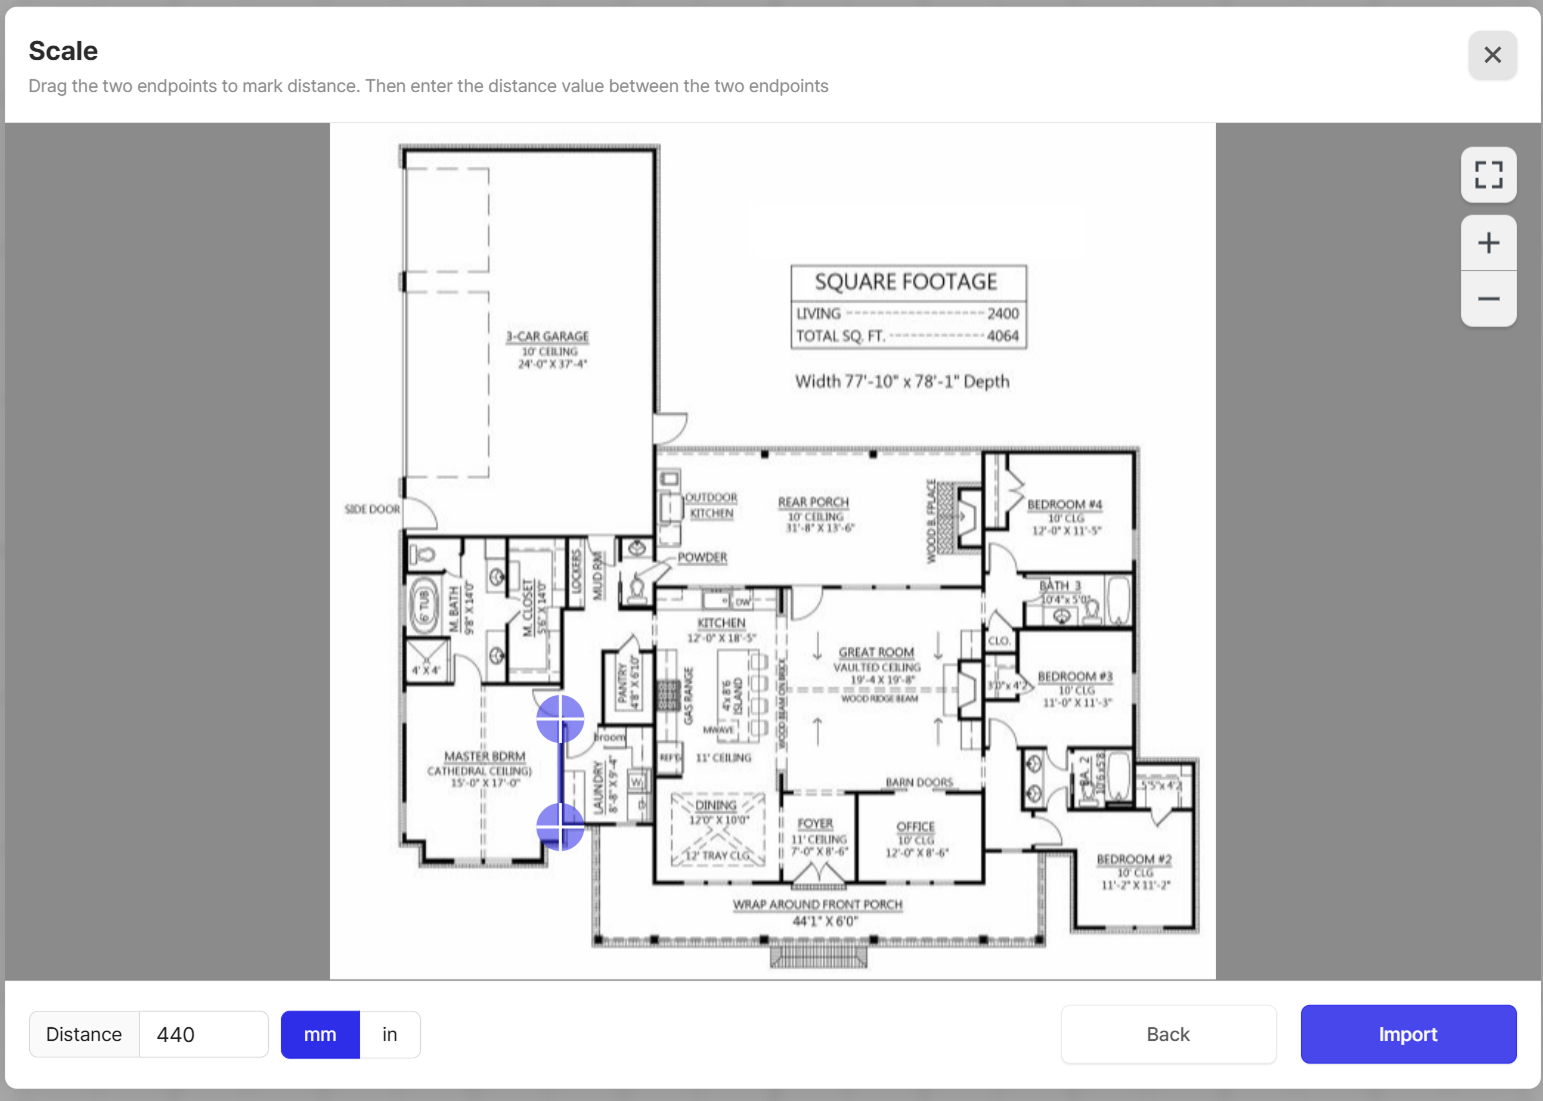
2) Set Just One Measurement
Most tools that convert floor plans into 3D models claim to do everything automatically, without any manual input. And that’s when doubts naturally arise.
"If it’s automatic, isn’t it inaccurate?"
"It may look convincing, but won’t the measurements be off when it comes to actual construction?"
These concerns are completely valid. But manually recreating every detail with professional 3D modeling software takes time—often more than you can afford.
That’s why the Archisketch development team spent years thinking about this challenge.
- Enter just one real-world dimension from your floor plan.
- The rest of the proportions are automatically calculated based on that reference.
- And if your construction plans change later, you can manually adjust specific measurements as needed.
- This approach balances both flexibility and precision.
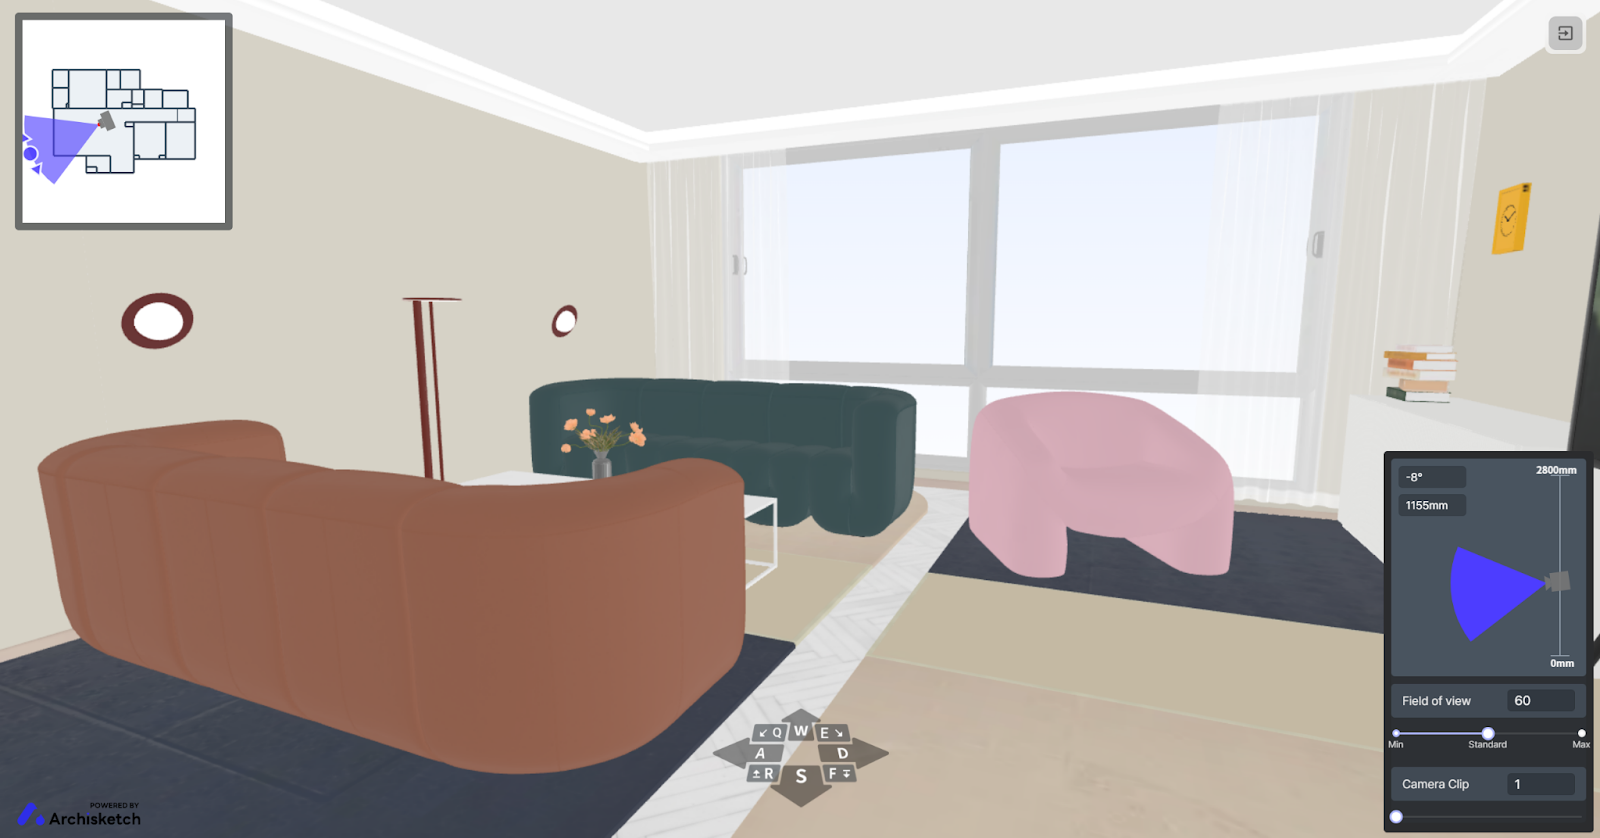
3) Place Building Materials and Furniture
Once the 3D framework is generated, it’s time to bring it to life. Freely place furniture and building materials using Archisketch’s extensive library.
The result becomes far more compelling from the client’s perspective—and it naturally leads to stronger purchase decisions.
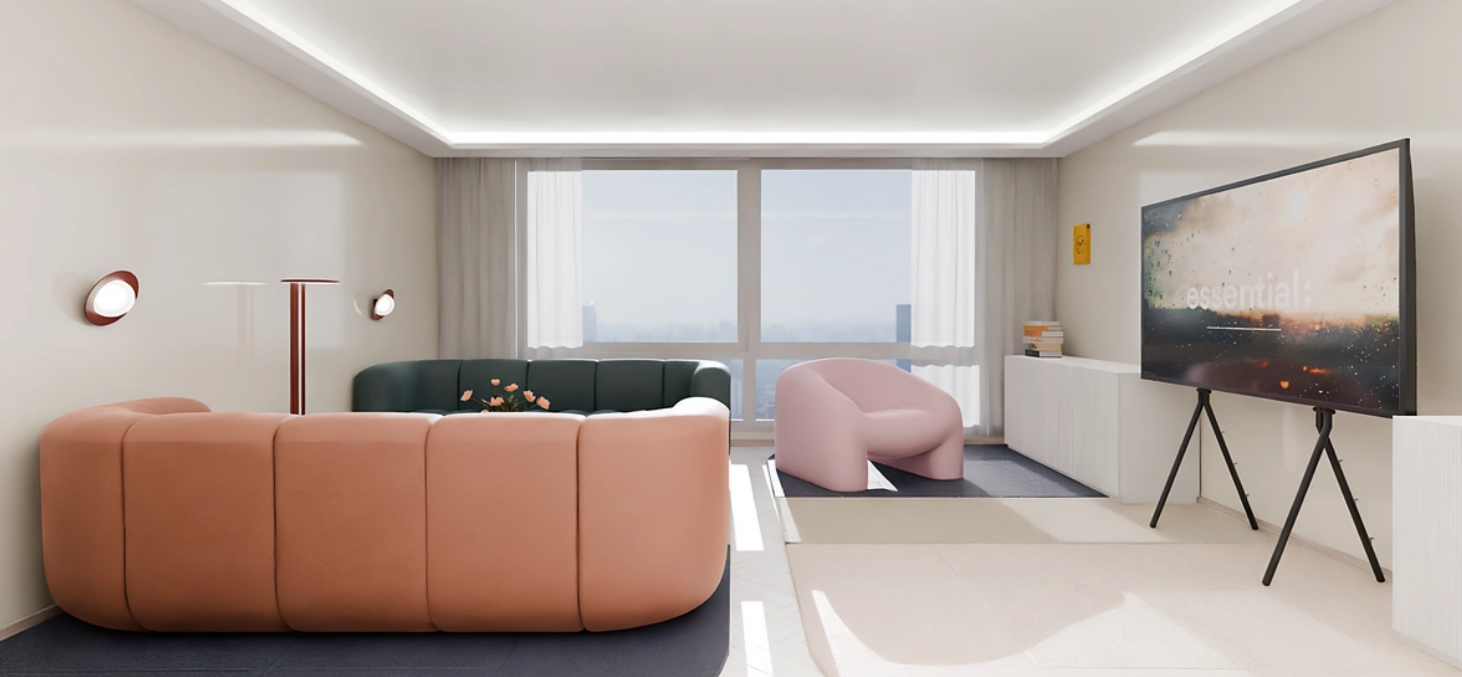
4) Add Realism with 3D Rendering
Clients visiting for interior consultations are often curious about the texture of building materials.
While you can show physical samples during meetings, it’s not always practical to present every possible option. That’s where 3D rendering becomes powerful.
Even within the same space, the atmosphere changes dramatically depending on time of day, weather, and lighting.
Morning and evening create entirely different moods, and natural light transforms how materials appear.
- With Archisketch, you can adjust lighting and sunlight timing.
- In other words, material colors and textures shift realistically based on light conditions.
- From the resident’s perspective, being able to visualize the space at different times of day makes your proposal far more persuasive.
As all these experiences come together, the client begins to feel something powerful:
"I want to live here."
What Are the Benefits of Turning Blueprints Into 3D?
Interior design, architecture, and remodeling firms that actively use Archisketch often highlight the following advantages when they turn blueprints into 3D models.
1) Identify Problems Before Construction Begins
Designs that look perfectly fine in 2D often reveal issues immediately when converted into 3D.
- Hallways may turn out narrower than expected, disrupting circulation.
- Door swing angles may collide with furniture.
- Window placement may not align well with lighting plans.
If these problems are discovered after construction starts, client complaints are almost inevitable. By identifying issues in 3D before breaking ground, you protect both your project and your client’s trust.
2) Calculate Material Quantities Accurately
A 3D model reflects wall areas, floor areas, and ceiling heights with precision. This allows you to calculate required quantities of tiles, flooring, moldings, paint, and other materials far more accurately.
Without this level of precision, you risk over-ordering or under-ordering materials—both of which cause unnecessary headaches. Accurate 3D modeling eliminates wasted cost and wasted time.
3) Compare Before and After Remodeling Realistically
Use 3D visuals during client consultations. Show them clearly and intuitively how their current space—or their future home—will transform.
You can even provide a VR tour, allowing clients to walk through a virtual space as if it were real.
Among So Many 3D Conversion Tools, What Makes Archisketch Different?
To be completely honest, Archisketch is not a tool for everyone. It’s the most efficient choice for professionals facing situations like these:
- Interior design firms that may not yet have deep 3D expertise but still need high-quality results capable of persuading clients
- Interior companies that need to generate 3D proposals quickly before client meetings, yet find outsourcing too costly and time-consuming
Here’s how the workflow connects seamlessly:
2D floor plan upload → dimension calibration → 3D model generation → material & furniture placement → rendering → client proposal → contract
From a single floor plan to a signed contract, Archisketch supports the entire workflow.
If you contact Archisketch, our team will be happy to provide detailed consultation. Before speaking with us, you can also try Archisketch for free on our official website.